Thin Gaps |
The EMA3D Thin Gap formalism allows the placement of thin gaps with gap widths too small to be directly resolved by the FDTD mesh. This can be useful when modeling such geometries as door seams, cracks, or small spaces between structures.
A thin gap can possess any width from zero up to the size of the FDTD mesh increment in the perpendicular direction to the gap and tangent to the surface. A gap width equal to the FDTD mesh increment, results in the same response as if a strip of material, the width of one mesh increment, was removed at the location of the gap.
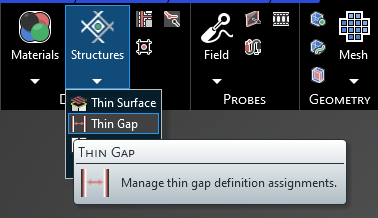
Click
 Structures within the Definitions section under the EMA3D tab in the ribbon. Then select
 Thin Gap.
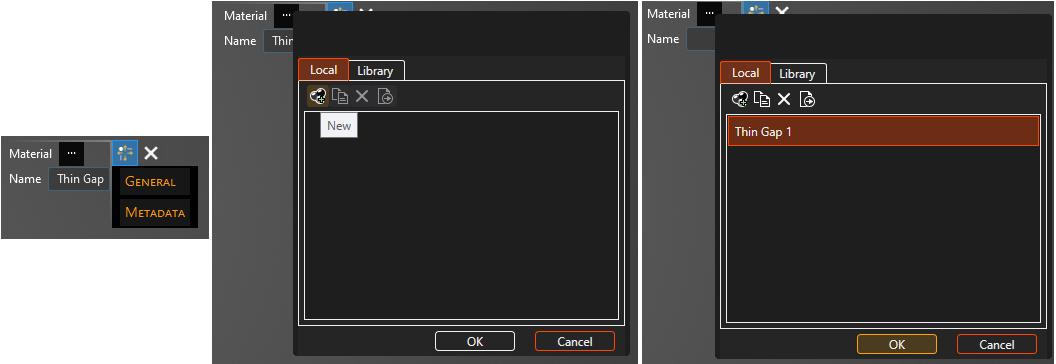
In the properties panel, select Materials. Select the drop-down arrow that appears to its right. A new window will appear. Select the
 New button. A new Thin Gap will appear. Double click it to assign it.
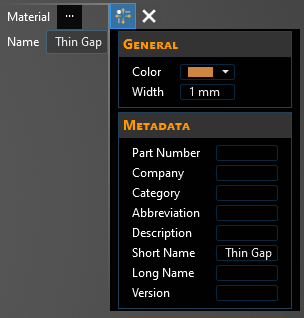
In the Properties Panel, adjust the thin gap properties as desired.
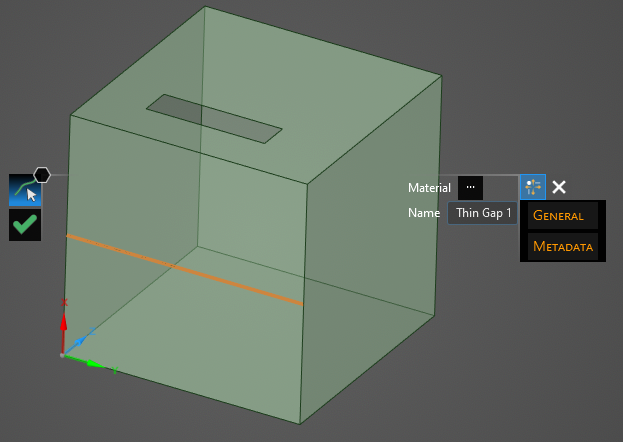
Use the select line
 tool to select the line(s) to which to assign the Thin Gap definition.
Click OK
 to complete the Thin Gap definition.
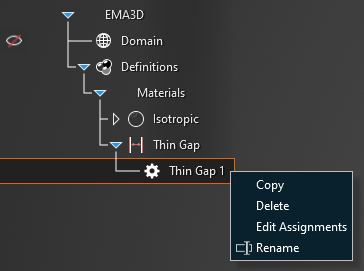
Adjust the definitions of the Thin Gap at any time by right clicking it within the Simulation Tree and selecting Edit from the pop-up menu.
Entry | Meaning |
|---|---|
Material | Local thin gap definition to assign to the geometry. |
Name | Name of the thin gap. |
Entry | Meaning |
|---|---|
Color | Color to use when rendering the gap. |
Width | Gap width [mm; must be ≤ spatial step in perpindicular direction]. |
Conductivity | Conductivity of the gap. |
Relative Permittivity (εᵣ) | Relative permittivity of the gap. |
Entry | Meaning |
|---|---|
Part Number | Part number of material (if any). |
Company | Company of material (if any). |
Category | Category of material (if any). |
Abbreviation | Abbreviation of material (if any). |
Description | Description of material (if any). |
Short Name | Short name description of material (if any). |
Long Name | Long name description of material (if any). |
Version | Version of material (if any). |
Other Resources
EMA3D – © 2026 EMA, Inc. Unauthorized use, distribution, or duplication is prohibited.